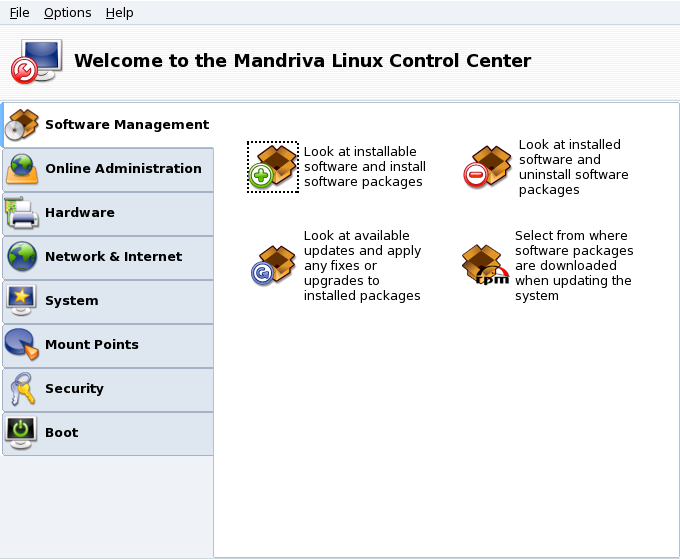
The Mandriva Linux Control Center (MCC) enables the system administrator to configure the hardware and the services used by all users in a friendly way.
![]() Access the Mandriva Linux Control Center through the main menu
(+ → ).
Access the Mandriva Linux Control Center through the main menu
(+ → ).
![[Note]](images/note.png) |
Tools Availability |
|---|---|
Some of the Control Center tools will be shown only when they are actually installed on the system. |
Here are some of the available menu entries:
→ . When activated this option displays a Tools Logs window. It shows all system modifications made by the configuration tools launched from within Mandriva Linux Control Center.
→ . Gives you access to some of the more advanced tools, which are shown in the table below.
→ . Opens the help browser which displays documentation about the active configuration tool.
→ . Allows you to report a bug to the development team. See Section 2, “Raise an Issue”.
The tools are sorted into categories. The following table lists them all and refers to the corresponding sections of this manual.
Table 6.1. Overview of Graphical Tools
| Software Management | Chapter 7, Package Management |
| Hardware | Section 1, “Configuring Your Hardware” |
| Section 2, “Controlling the Graphical Configuration” | |
| Section 3, “Configuring a 3D Desktop” | |
| Section 4, “Changing Your Keyboard Layout” | |
| Section 5, “Changing Your Mouse” | |
| Section 6, “Configuring Printers with PrinterDrake” | |
| Section 7, “Installing and Sharing Scanners” | |
| Section 8, “Setting up your UPS” | |
| Network & Internet | Section 1, “Network and Internet Connection Management” |
| Section 1.6, “Proxy Settings” | |
| Section 3, “Sharing an Internet Connection” | |
| Section 2, “Activating and Managing Network Profiles” | |
| Section 4, “Managing Wireless Connections (Roaming)” | |
| Configure VPN Connections: Allows you to setup a Virtual Private Network with a remote VPN server. Protocols supported are Cisco VPN Concentrator and OpenVPN. | |
| Manage host definitions: If you have fixed IP addresses on your network, this tool allows you to associate names to those IPs, easier to remember. | |
| System | |
| Menu style configuration: This utility allows you to switch the menu style from the “Discovery” one, to the more complete “Mandriva” one. | |
| Display manager chooser: allows you to choose the X11 display manager for users who graphically log onto the machine. Basically, all display managers offer the same features, it's just a question of taste. | |
| Section 1, “Configuring Start-Up Services” | |
| Section 2, “Managing Fonts on your System with DrakFont” | |
| Section 3, “Setting your Machine's Date and Time” | |
| Select the language and the country or region: This utility allows you to switch the main language of the system, as well as local settings. First choose the language to be used, then the country or region. | |
| Section 4, “Monitoring System Activity” | |
| Console: simply opens a terminal to directly enter commands from the administrator account (root). | |
| Section 5, “Managing Users and Groups” | |
| Section 6, “Backing Up and Restoring your Files” | |
| Mount Points | Section 1, “Managing your Hard Drive Partitions with DiskDrake” |
| Section 2, “Managing Removable Devices” | |
| Section 4, “Importing Remote NFS Directories” | |
| Manage NFS Shares: Allows you to create and maintain shares to be mounted by other UNIX® machines on the local network. | |
| Section 3, “Importing Remote SMB Directories” | |
| Section 5, “Allowing Users to Share Folders” | |
| Manage Samba configuration: This tool allows you to manage the folders and printers of your machine shared with Windows® machines on the local network. It also allows you to manage Samba users for shares access control. | |
| Section 3, “Securing your Internet Access via DrakFirewall” | |
| Boot | Section 1, “Configuring the Login Mode” |
| Section 2, “Changing Your Boot-up Configuration” | |
| Section 3, “Customizing your Boot Theme” |