 |
Blender : Modelling with cross
sections
By Olivier Saraja |
 |
|
Blender : Modelling with cross
sections
By Olivier Saraja |
|
First of all, we will use The GIMP software in order to generate a Height Map for our landscape. This tutorial assumes that you are already familiar with The GIMP and Blender.
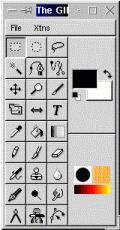
Upon starting of The GIMP, we'll get the following window :
 |
Click on the Xtns menu title, select Script-Fu, then Patterns and Flatland, which is the special effect we are looking for. | 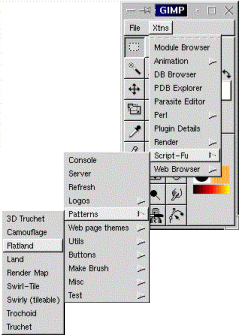 |
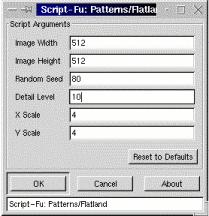 VYou
obtain the hereafter dialog box. For your first try, use the following
parameters : Image Width : 512, Image Height : 512, Detail Level : 10.
Feel free to try other values as needed. Pay a special attention to the
values of Random Seed and Detail Level.
VYou
obtain the hereafter dialog box. For your first try, use the following
parameters : Image Width : 512, Image Height : 512, Detail Level : 10.
Feel free to try other values as needed. Pay a special attention to the
values of Random Seed and Detail Level.
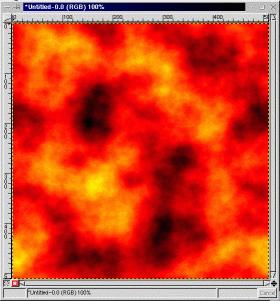
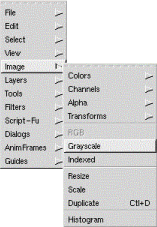
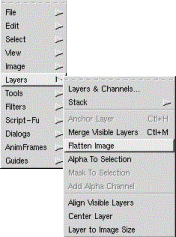
You should obtain a
color Height Map like the one below. To have Blender working with it without
trouble, you should also transform it in grayscale, and then flatten it.
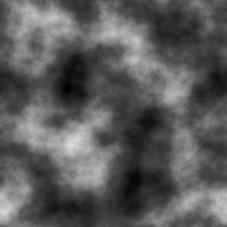 And
here is a full Height Map, ready for use, obtained with a few clicks only
with The GIMP ! You just have to save it with the name and in the directory
of your choice.
And
here is a full Height Map, ready for use, obtained with a few clicks only
with The GIMP ! You just have to save it with the name and in the directory
of your choice.
|
|
|